
No products in the cart.



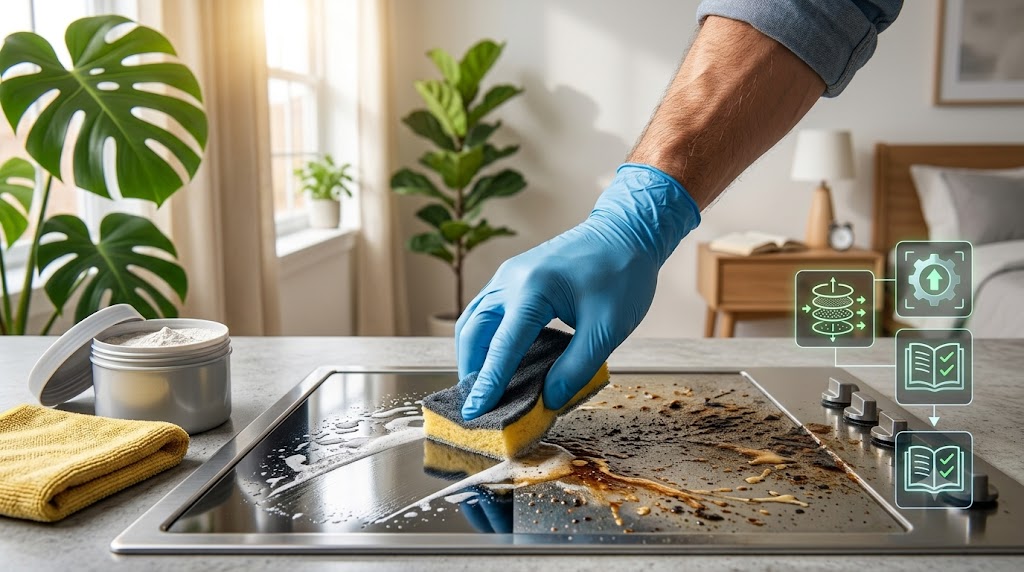
Have you ever wiped your kitchen counter, washed the dishes, and thought your kitchen was clean — but then noticed sticky cabinet handles, greasy areas near the stove, dirty corners, or a strange smell coming from somewhere? You are not alone. Many kitchens look clean on the surface but still contain hidden dirt, bacteria, and old food buildup in places we often forget.
The kitchen is one of the busiest areas in any home. Every day, we prepare meals, store food, wash dishes, and handle different ingredients. Over time, grease, crumbs, stains, and germs slowly build up on surfaces, appliances, and hidden spaces. This is why regular cleaning is important, but sometimes your kitchen needs more than a quick wipe. It needs a proper deep clean.
Learning how to deep clean your kitchen can completely change how your home feels. A fresh kitchen is not only more beautiful but also healthier and more comfortable for your family. A clean cooking space helps prevent bad odors, reduces bacteria, protects your appliances, and makes cooking more enjoyable.
The good news is that you do not need expensive products or professional services to achieve a spotless kitchen. With the right kitchen deep cleaning steps, simple tools, and a little time, anyone can create a cleaner and healthier kitchen.
This complete kitchen cleaning guide will show you the easiest methods, from removing grease and cleaning appliances to organizing cabinets and maintaining a fresh kitchen every day.
A kitchen is more than just a place where food is prepared. It is where families gather, meals are created, and memories are made. Because of daily use, kitchens collect more dirt than many other rooms in the house.
Regular cleaning removes visible mess, but deep cleaning focuses on areas that are often ignored. These hidden areas can include the inside of cabinets, behind appliances, refrigerator shelves, oven corners, and kitchen drains.
A proper deep clean helps you:
Many people avoid deep cleaning because they think it takes an entire day. However, when you follow a planned system, you can deep clean kitchen fast without feeling overwhelmed.
Before you begin cleaning, prepare all your supplies. Having everything nearby saves time and makes the process easier.
A good kitchen deep cleaning checklist includes basic cleaning tools that you may already have at home.
| Cleaning Tool | Purpose |
|---|---|
| Microfiber cloths | Wiping surfaces without scratches |
| Scrubbing brush | Removing tough dirt |
| Sponge | Cleaning sinks and counters |
| Bucket | Holding water and cleaning solutions |
| Gloves | Protecting your hands |
| Spray bottles | Storing homemade cleaners |
| Vacuum or broom | Removing dust and crumbs |
| Baking soda | Natural stain removal |
| White vinegar | Removing odors and grease |
You do not need to spend a lot of money. Many effective cleaners are affordable.
| Product | Average Price |
|---|---|
| Microfiber Cloth Pack | $5 – $15 |
| All-Purpose Kitchen Cleaner | $4 – $10 |
| Baking Soda | $1 – $3 |
| White Vinegar | $2 – $5 |
| Scrubbing Brush | $3 – $8 |
| Dish Soap | $3 – $6 |
| Cleaning Gloves | $2 – $5 |
A complete kitchen cleaning setup can usually be created for less than $30.
The first step in the best way to deep clean a kitchen is removing unnecessary items. Cleaning becomes difficult when counters and shelves are crowded.
Start by removing:
This process is called decluttering. When you declutter kitchen space, you create more room and make cleaning much easier.
Many people try to clean around clutter, but this only hides the problem. A clear kitchen allows you to reach every corner.
After removing unnecessary items, organize the things you use regularly. This will help you organize kitchen after cleaning and maintain the space for longer.
One of the most important deep cleaning kitchen tips is cleaning from top to bottom.
Why?
Because dust and dirt fall downward. If you clean the floor first, you may need to clean it again after wiping cabinets and shelves.
Follow this order:
This method saves time and gives better results.
Kitchen cabinets collect fingerprints, grease, dust, and food particles over time. Since cabinets store food and dishes, they should be cleaned regularly.
A proper kitchen cabinet deep cleaning includes both the outside and inside surfaces.
Cabinet doors near the stove usually collect grease faster.
For grease removal:
For stubborn grease, baking soda mixed with a small amount of water can create a gentle cleaning paste.
To clean kitchen cabinets inside and out, remove everything from shelves first.
Check:
Then:
This is also a great time to do pantry cleaning and organization.
Kitchen countertops are used every day, making them one of the most important areas to clean properly.
Good kitchen countertop cleaning tips include cleaning immediately after spills and avoiding harsh chemicals that may damage surfaces.
Different countertop materials require different care.
| Countertop Type | Cleaning Method |
|---|---|
| Granite | Mild soap and water |
| Quartz | Gentle cleaner |
| Marble | Avoid acidic cleaners |
| Laminate | Warm water and mild soap |
| Stainless Steel | Soft cloth and cleaner |
For a clean kitchen naturally, you can use simple ingredients like vinegar and baking soda, but always check if your countertop material can handle them.
Grease is one of the biggest kitchen cleaning problems. It builds up around stoves, cabinets, backsplashes, and exhaust areas.
Many homeowners ask:
“How can I remove grease buildup in my kitchen?”
The easiest method is using warm water, dish soap, and gentle scrubbing.
For heavy grease:
These simple grease removal from kitchen surfaces methods help remove kitchen grime and dirt without damaging surfaces.
Kitchen appliances make cooking easier, but they also collect grease, food particles, fingerprints, and bacteria. Many people clean the outside of appliances but forget the hidden areas where dirt builds up.
A proper deep clean should include all major appliances because they directly affect food preparation and kitchen hygiene.
Many homeowners ask:
“How do I clean kitchen appliances deeply?”
The answer is simple: clean each appliance according to its purpose, remove old food buildup, and create a regular maintenance habit.
Following proper appliance cleaning methods helps your machines work better and last longer.
The oven is one of the most difficult kitchen areas to clean because baked-on food and grease become harder over time.
Regular wiping may remove small spills, but a deep clean removes old stains and burnt residue.
For natural kitchen cleaning solutions, baking soda and water can work well for many ovens.
Create a paste:
Apply it inside the oven, leave it overnight, then wipe it away.
Do not forget:
These small areas often collect hidden grease.
Your refrigerator stores the food your family eats every day, so keeping it clean is essential.
A proper refrigerator cleaning checklist helps you avoid forgotten food, bad smells, and unnecessary waste.
Take out all food items and place them on the counter.
Check:
Throw away anything unsafe.
Remove removable parts and wash them with warm water.
Clean:
Dry everything before putting it back.
After cleaning, group similar items together.
Example:
| Refrigerator Section | Items |
|---|---|
| Top Shelf | Ready-to-eat foods |
| Middle Shelf | Dairy products |
| Lower Shelf | Raw ingredients |
| Drawers | Fruits and vegetables |
| Door Shelves | Sauces and drinks |
A clean refrigerator makes cooking easier and reduces food waste.
Microwaves often collect food splashes, oil stains, and unpleasant smells.
The good news is that cleaning a microwave does not require heavy scrubbing.
This is one of the easiest microwave cleaning methods because steam softens stuck food.
Remember to clean:
Many people think dishwashers clean themselves because they wash dishes every day. However, food particles and mineral buildup can collect inside.
Following proper dishwasher cleaning tips improves performance.
A clean dishwasher means cleaner dishes.
The sink is one of the busiest areas in the kitchen. It handles dirty dishes, food scraps, and water buildup, making it a place where bacteria can grow.
Learning how to clean kitchen sink naturally can help keep your kitchen fresh without using strong chemicals.
You need:
Steps:
This method helps remove stains, odors, and buildup.
Do not forget:
These areas are touched frequently and should be cleaned often.
The backsplash protects your walls from cooking mess, but it also collects oil, sauce stains, and dust.
A dirty backsplash can make an otherwise clean kitchen look messy.
To clean kitchen backsplash properly:
Tile floors and backsplash grout can become dark because dirt gets trapped inside small spaces.
To clean kitchen tiles and grout:
Avoid using extremely harsh chemicals because they may damage surfaces over time.
Kitchen floors experience daily traffic, spills, crumbs, and grease. Sweeping alone is not enough for a true deep clean.
A proper kitchen floor deep cleaning process includes:
Vacuum or sweep the entire floor.
Pay attention to:
Use a suitable cleaner based on your flooring type.
| Floor Type | Cleaning Method |
|---|---|
| Tile | Warm water and mild cleaner |
| Vinyl | Gentle floor solution |
| Hardwood | Wood-safe cleaner |
| Stone | Stone-specific products |
Do not forget:
These places often collect hidden dirt.
Many people prefer avoiding strong chemicals, especially in areas where food is prepared.
Using natural kitchen cleaning solutions can be a safer and affordable option.
Common natural ingredients include:
Useful for:
Useful for:
Useful for:
Creating homemade kitchen cleaners is simple and budget-friendly.
Ingredients:
Use for:
Ingredients:
Use for:
If you want a healthier home, choose environmentally friendly cleaning habits.
Some eco-friendly kitchen cleaning tips include:
Small changes can make your kitchen cleaner and better for the environment.
Professional cleaners follow systems that make cleaning faster and more effective.
Some useful professional kitchen cleaning tips include:
Professionals do not necessarily use expensive products. They use better techniques and consistency.
A deep-cleaned kitchen looks amazing, but keeping it that way requires a simple routine. Many people clean their kitchen only when it becomes extremely dirty, which makes the task feel stressful and time-consuming.
The secret is creating a kitchen cleaning routine that fits your daily lifestyle. Small cleaning habits every day prevent grease, dust, and food buildup from becoming bigger problems.
A good routine does not mean spending hours cleaning every day. It means doing small tasks regularly so your kitchen stays fresh with less effort.
For example, wiping countertops after cooking, washing dishes before sleeping, and cleaning spills immediately can make your kitchen much easier to maintain.
A weekly cleaning schedule keeps your kitchen fresh and prevents dirt from building up.
Here is a simple plan:
| Day | Cleaning Task |
|---|---|
| Monday | Clean countertops and sink |
| Tuesday | Wipe appliances |
| Wednesday | Clean microwave and small appliances |
| Thursday | Organize pantry items |
| Friday | Clean floors |
| Saturday | Check refrigerator |
| Sunday | Quick kitchen reset |
You can adjust this schedule based on your lifestyle.
A busy family may prefer completing small tasks throughout the week, while others may choose one cleaning day.
The important thing is consistency.
A monthly kitchen deep cleaning routine focuses on areas that do not need daily attention but still collect dirt.
Monthly tasks include:
A monthly deep clean keeps your kitchen healthy and reduces the need for large cleaning projects.
Use this checklist whenever you want to refresh your entire kitchen.
☐ Gather cleaning supplies
☐ Remove unnecessary items
☐ Empty countertops
☐ Open windows for fresh air
☐ Clean cabinet doors
☐ Wipe inside shelves
☐ Remove expired products
☐ Organize kitchen items
☐ Clean refrigerator
☐ Deep clean oven
☐ Wash microwave
☐ Clean dishwasher
☐ Wipe small appliances
☐ Clean countertops
☐ Remove grease buildup
☐ Clean backsplash
☐ Wash sink area
☐ Sweep or vacuum
☐ Mop properly
☐ Clean corners
☐ Remove hidden dirt
Even when people clean regularly, they sometimes make mistakes that reduce results.
Avoid these common problems:
Many people clean countertops and ignore hidden spaces.
Do not forget:
These areas collect dirt over time.
More cleaner does not always mean better results.
Using too much product can leave sticky residue and attract more dirt.
Use the recommended amount and rinse properly when needed.
Small spills become harder to remove when they dry.
Cleaning immediately saves time later.
Items like cutting boards, knives, and cooking tools also need deep cleaning.
Wash them properly and replace damaged items when necessary.
Having the right tools makes kitchen cleaning faster and easier.
The best kitchen cleaning tools include:
| Tool | Purpose |
|---|---|
| Microfiber cloth | Surface cleaning |
| Scrub brush | Removing tough dirt |
| Spray bottle | Homemade cleaners |
| Dish brush | Cleaning dishes and sinks |
| Vacuum | Removing crumbs |
| Mop | Floor cleaning |
| Cleaning gloves | Hand protection |
| Storage baskets | Organization |
Good tools save time and improve cleaning results.
Many people ask:
“How often should I deep clean my kitchen?”
The answer depends on how often you cook and how many people use the kitchen.
A general schedule:
| Cleaning Type | Frequency |
|---|---|
| Daily Cleaning | Every day |
| Quick Organization | Several times per week |
| Appliance Cleaning | Monthly |
| Cabinet Cleaning | Every 2–3 months |
| Full Deep Cleaning | Every 3–6 months |
Homes that cook frequently may need deep cleaning more often.
Even clean kitchens can have hidden dirty areas.
Commonly missed places include:
These small areas are touched frequently and should be included in your cleaning routine.
Maintaining a clean kitchen does not require a lot of effort.
Follow these simple habits:
These habits prevent clutter and reduce deep cleaning time.
Many people wonder:
“How do professionals deep clean a kitchen?”
Professional cleaners usually follow a structured process.
They:
Their biggest secret is not special products — it is having a clear method.
You can use the same approach at home.
If you have limited time, you can still make a big improvement.
Small cleaning sessions can create noticeable result
A clean kitchen does not require expensive products.
Try these budget-friendly ideas:
These methods are practical for anyone looking for affordable home care solutions.
Learning how to deep clean your kitchen is about more than removing dirt. It is about creating a space where your family feels comfortable, where cooking becomes enjoyable, and where everyday tasks become easier.
A kitchen does not need to look perfect all the time. What matters is having a simple system that works for you. With regular cleaning habits, smart organization, and the right techniques, you can keep your kitchen fresh without feeling overwhelmed.
Start with one small area today. Clean a drawer, organize a shelf, or wipe down an appliance. Small steps create big changes over time.
A clean kitchen means fewer worries, healthier meals, and a more peaceful home.
By following this kitchen deep cleaning checklist, using practical deep cleaning kitchen tips, and building a simple kitchen cleaning routine, anyone can maintain a beautiful, hygienic, and welcoming kitchen.

Leave a comment