
No products in the cart.


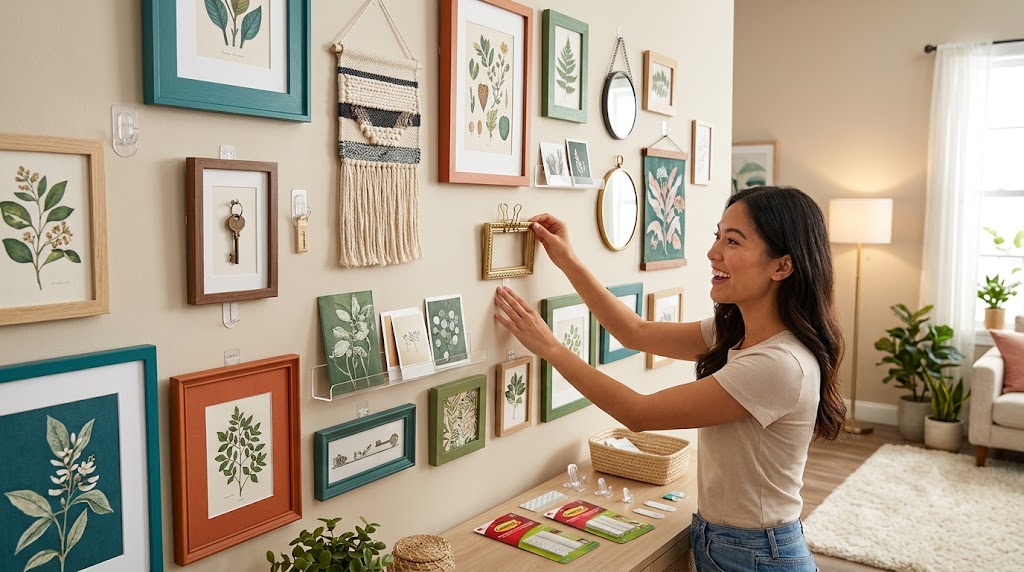
Have you ever stood in front of a blank wall in your rented room, holding a poster or a picture frame, and then just… put it back down because you remembered you’re not allowed to put holes in the wall? It’s such a frustrating feeling. You want your room to look nice, you want it to feel like home, but every time you think about decorating, this little worry pops up in your head: “What if I damage the wall and lose my deposit?” or “What if my parents get upset about holes in the wall?” So instead, you leave your walls empty, and your room ends up feeling unfinished and a little sad, even though everything else about it is fine.
Here’s something that might make you feel a lot better: you can absolutely have a beautiful, full, decorated room without ever picking up a hammer or a nail. Wall decor without nails has actually become one of the most popular ways to decorate, not just for renters who legally can’t damage their walls, but for anyone who wants the freedom to change their mind, move things around, or take everything down without leaving a mark. This guide is going to show you exactly how to fill your walls with color, personality, and style, all without a single hole.
If you’re renting a room or an apartment, or even if you’re a student or teen living in a room your parents control, damaging the walls can come with real consequences, whether that’s losing part of your security deposit or simply upsetting the people you live with. This is exactly why renter-friendly wall decor has become such an important skill to learn. It’s not just about avoiding trouble, it’s about giving yourself the freedom to decorate confidently, knowing you won’t have to deal with patching holes, painting over marks, or explaining damage later on.
There’s also a hidden benefit to no-nail decorating that a lot of people don’t think about right away: flexibility. When your decor isn’t permanently attached to the wall, you can rearrange things whenever you want, try out a completely new layout, or take a piece down the moment you get bored of it, all without any extra work or damage. This makes damage-free wall decor a smart choice even for people who technically could use nails, simply because it keeps your room easy to update as your taste changes over time.
This flexibility becomes especially valuable if you move often, whether that’s switching apartments every year, moving between a dorm and home during school breaks, or simply changing bedrooms within the same house. Instead of starting from scratch every single time, renter-friendly decor lets you pack up your entire wall setup, photo ledges, string lights, removable prints, and all, and bring it with you to your next space almost exactly as it was, saving both time and money in the long run.
Before you buy any decorating supplies, it’s worth taking a few minutes to actually check your lease agreement or, if you’re living with family, to have a quick conversation about what’s allowed on the walls. Some leases are stricter than others, some allow small nail holes as long as they’re patched before move-out, and some don’t allow any wall damage at all, including certain types of adhesive strips on specific paint finishes. Knowing these rules ahead of time saves you from any surprises later and helps you choose the right tools from the start, rather than realizing halfway through your decorating project that something you already put up isn’t actually allowed.
The entire world of no nail wall decor ideas exists because of a handful of clever tools designed specifically to hold weight on walls without leaving permanent damage. Getting familiar with these tools is the first step toward decorating your room with total confidence.
Command strips and hooks are probably the most well-known tool in the entire renter-friendly decorating world, and for good reason. These adhesive strips are designed to hold a surprising amount of weight, from lightweight posters all the way up to small shelves and mirrors, depending on the strength and size you choose. The biggest advantage of command strips wall decor is how cleanly they come off when you’re ready to remove them. Instead of ripping paint or leaving sticky residue, you simply pull the tab straight down along the wall, and the adhesive releases without damage, as long as you follow the instructions and don’t try to pull them straight off the wall.
When choosing command strips, always check the weight limit printed on the package, and remember that using more strips than the minimum recommended amount is always safer than using too few, especially for heavier items like small shelves or larger frames.
Beyond command strips, there are other removable tape and adhesive options worth knowing about, especially for lighter decor items like paper art, small photos, or fabric pieces. Washi tape, poster putty, and specially designed removable mounting tape are all great options for lightweight items, since they’re gentle enough not to damage paint but still strong enough to hold paper and light fabric securely in place.
Poster putty in particular is a favorite among students and renters because it’s reusable, inexpensive, and works well on a huge range of surfaces, including textured walls where tape sometimes struggles to stick properly. A small ball of putty pressed onto the back corners of a poster or lightweight print is usually enough to keep it firmly in place for months at a time.
Washi tape deserves a special mention too, since it does double duty as both an adhesive and a decoration on its own. Because it comes in so many colors and patterns, you can use strips of washi tape to create a fake “frame” around a poster, build simple geometric shapes directly on the wall, or even section off part of a wall into a mock accent panel, all without needing any other materials. And because it peels away easily and cleanly, even from most painted surfaces, it’s one of the lowest-risk options available for anyone nervous about damaging their walls for the very first time.
While there are plenty of safe options, there are also a few materials worth avoiding if you want to keep your walls truly damage-free. Regular clear tape, duct tape, and strong packing tape can all pull paint off the wall when removed, especially on freshly painted or glossy surfaces. Similarly, super glue or any permanent adhesive should be avoided completely, since these are designed to bond permanently and will almost certainly damage the wall underneath when you try to take them down. When in doubt, always choose products that are specifically labeled as “removable” or “renter-friendly,” since these are tested to come off cleanly under normal conditions.
Not every wall is smooth, flat, and easy to decorate, and if you’re dealing with textured plaster, brick, or slightly rough painted surfaces, you might feel like all the usual no-nail tricks won’t work for you. The good news is that most textured walls can still be decorated safely, you just need to choose your tools a little more carefully. Poster putty tends to perform much better than flat adhesive strips on bumpy or textured surfaces, since it can mold itself into small grooves and dips rather than needing a perfectly flat area to bond to.
For heavier items on textured walls, look specifically for command strips labeled as designed for textured surfaces, since regular strips often struggle to form a strong enough bond on anything other than smooth paint. Alternatively, leaning decor against the wall instead of mounting it directly, using a photo ledge, a leaning mirror, or even a large piece of art propped on top of a dresser, sidesteps the adhesion problem completely while still giving your wall a decorated, finished look.
Learning how to hang pictures without nails opens up a huge range of decorating possibilities, since photos and framed art are often the heart of a well-decorated wall. Thankfully, there are several creative, damage-free ways to display your favorite images.
A photo ledge is a small, narrow shelf designed specifically to hold framed pictures upright, allowing you to layer and rearrange your photos anytime without needing a separate nail for each individual frame. Most photo ledges can be mounted using strong command strips or even simply leaned against the wall on top of a dresser or desk, giving you the flexibility to swap photos in and out as often as you like. This approach also lets you display more photos in the same amount of wall space, since frames can overlap slightly, creating a layered, gallery-style look with very little effort.
Photo ledges also solve a problem a lot of renters run into: the fear of measuring wrong. When you’re hanging individual nails, one crooked frame can throw off the whole wall, and fixing it means more holes. With a ledge, you mount just one item, and everything displayed on top can be shifted, swapped, or leaned at an angle anytime you like, with zero commitment and zero extra wall damage. This makes it an especially good choice for anyone who likes to update their photo collection often, since new memories can simply be added to the front of the ledge without disturbing anything already there.
For an even more casual, personal look, a string and clip photo display is one of the easiest and cheapest renter-friendly wall decor ideas around. Simply attach a length of string or ribbon to the wall using two small command hooks, one on each end, and then use small clips or clothespins to attach your favorite photos along the string. This method is incredibly flexible, since adding, removing, or rearranging photos takes only a few seconds, and it works beautifully for displaying photos of friends, family, or memorable moments in a way that feels warm and personal.
[Image Placeholder 1: A bedroom wall decorated with a string photo display, a leaning photo ledge, and a small removable poster — Caption: “String displays and photo ledges make it easy to fill a wall with memories, no nails required.”]
No matter what kind of aesthetic you’re going for, there’s a renter-friendly way to achieve it. The trick is simply choosing the right no-nail tools to match the specific decor items you already love.
If your style leans cozy and minimalist, focus on a small number of meaningful pieces rather than covering the entire wall. A single large removable print, hung using strong adhesive strips, paired with one small floating shelf mounted using a heavy-duty command strip, can create a calm, intentional look without needing more than two or three items total. Soft, neutral-toned prints and simple black or white frames tend to work especially well within this style, keeping the wall feeling peaceful rather than cluttered.
If you prefer a bolder, more colorful look, removable wallpaper is an incredible tool worth knowing about. Unlike traditional wallpaper, removable versions use a peel-and-stick adhesive that comes off cleanly without damaging paint underneath, making it perfect for renters who still want the bold visual impact of a patterned or colorful wall. You don’t need to cover your entire wall either, a single accent section behind your headboard or desk can add major personality to a room using just a small roll of removable wallpaper.
Beyond wallpaper, bold fabric hangings are another great option for renters who love color and pattern but don’t want to commit to something as involved as wallpaper application. A large piece of patterned fabric, a tapestry, or even a bedsheet with a print you love can be hung using a simple tension rod wedged between two walls or window edges, requiring absolutely no adhesive or wall contact at all. This kind of decor also tends to be the easiest to change seasonally, since swapping one fabric panel for another takes only a minute or two, letting you refresh your room’s whole color scheme without any tools, mess, or risk of damage.
Making your own wall decor is one of the most rewarding and affordable ways to fill empty wall space, and thankfully, DIY wall decor without holes is easier than most people expect. A few beginner-friendly ideas include:
Each of these projects uses materials that are either completely removable or don’t require any adhesive contact with the wall at all, meaning you get full creative freedom without any risk to your deposit or your parents’ good mood.
[Image Placeholder 2: A cozy corner with removable wallpaper behind a desk and a floating shelf holding books and a small plant — Caption: “A small section of removable wallpaper adds bold color and pattern without any permanent commitment.”]
To help you plan your own no-nail decorating project, here’s a simple price guide covering the most popular renter-friendly tools and decor items.
| Item | Estimated Price Range | Best For |
| Command strips (variety pack) | Low | Hanging light to medium-weight items |
| Poster putty | Very Low | Lightweight posters and paper prints |
| Photo ledge shelf | Low to Medium | Layered, rearrangeable photo displays |
| Removable wallpaper (small roll) | Medium | Bold accent wall sections |
| String and clip display kit | Very Low | Personal photo walls |
| Tension rod (for fabric hangings) | Low | No-adhesive fabric wall art |
| Removable mounting tape | Low | Lightweight frames and art |
| Corkboard or memo board | Low | Organized, damage-free notes display |
| Small floating shelf (adhesive mount) | Medium | Extra storage without drilling |
| Removable print or poster | Low | Quick, affordable wall color |
As with any decor project, prices will vary depending on where you shop, but starting with command strips, poster putty, and a string photo display gives you the most decorating power for the least amount of money.
[Image Placeholder 3: A minimalist rented room with a single large framed print and a small floating shelf, both mounted without nails — Caption: “A few carefully chosen pieces, all mounted with removable adhesive, can make a rented room feel just as finished as an owned one.”]
Use this simple checklist to guide your own renter-friendly wall decor project from start to finish:
It might seem like avoiding nails automatically means avoiding all wall damage, but there are still a few common mistakes worth watching out for. One of the biggest is removing adhesive strips or tape too quickly or by pulling them straight outward instead of following the proper removal method. Most command-style products are designed to release cleanly only when pulled slowly and directly downward, parallel to the wall, so yanking them off at an angle can tear paint even from products labeled as removable.
Another common mistake is leaving decor up for far too long without checking on it. Adhesive can weaken over time, especially in humid rooms or during temperature changes, and an item that suddenly falls can sometimes take a small bit of paint with it or leave a sticky residue that’s harder to clean the longer it sits. Checking your wall decor every few months, especially heavier pieces, helps you catch any weakening adhesive before it becomes a bigger problem. Finally, overloading a single strip or hook beyond its rated weight limit is a mistake that can cause both the item to fall and potential damage to the wall, so it’s always worth using slightly more support than you think you need, especially for anything fragile or valuable.
1. Will command strips damage painted walls? When used correctly and removed slowly by pulling the tab straight down, command strips are designed to come off cleanly without damaging most painted walls.
2. What is the best way to hang heavy frames without nails? Heavy-duty command strips rated for the specific weight of your frame, or a photo ledge shelf, are both strong, damage-free options for heavier items.
3. Can I use removable wallpaper if I’m renting? Yes, removable wallpaper is designed specifically for renters and can usually be peeled off cleanly without damaging the wall underneath, though it’s always smart to test a small section first.
4. How do I hang string lights without nails? Small command hooks placed at each end of your string light run are usually strong enough to hold the light strand securely without any wall damage.
5. What can I use instead of tape for paper posters? Poster putty is a great tape-free option for lightweight paper posters, since it holds securely but comes off cleanly without leaving marks.
6. How much weight can command strips hold? This depends on the specific strip size and strength, so always check the packaging, but most range from very light items up to a few pounds for heavy-duty versions.
7. Can I remove and reuse command strips? Most command strips are designed for one-time use per strip, but many brands offer refill adhesive strips so you can reuse the same plastic hook multiple times.
8. Is renter-friendly decor more expensive than regular decor? Not usually, since most no-nail tools like command strips, tape, and putty are actually quite affordable and often cost less than traditional picture hanging hardware.
Empty walls don’t have to stay empty just because you can’t use nails. With the right tools, a little planning, and a bit of creativity, wall decor without nails can look just as full, personal, and beautiful as any permanently mounted decor, without any of the risk or stress. So take a look at that blank wall you’ve been avoiding, pick one small renter-friendly idea from this guide, whether it’s a photo ledge, a string display, or a small piece of removable wallpaper, and finally give your room the finished, personal look it deserves.

Leave a comment